Criteria: 2,4,5
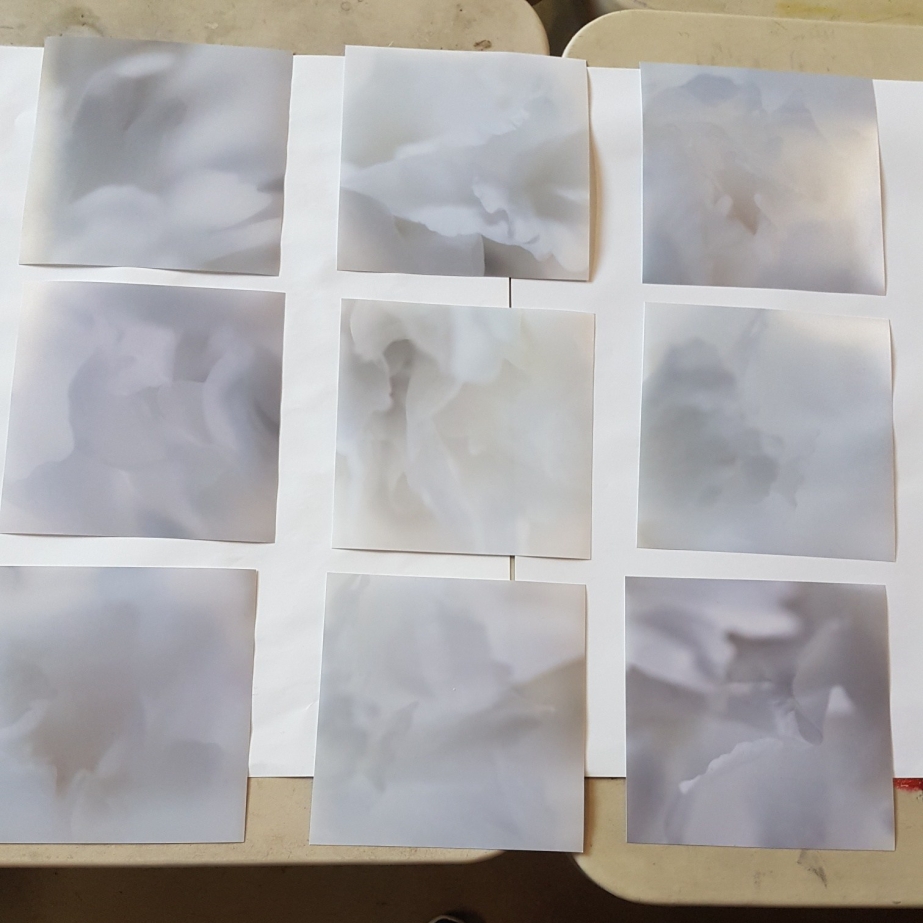
In the end I have gone with a selection of 9 images and decided to present them in a type of grid. Almost like a puzzle piece, each image relates to each other; the images are not sequential and the narrative does not develop from where you start to where you end. Basically, simulating (in a way) the radial pattern of a flower, the viewer is drawn into the centre of a selection of images (a slightly warmer image) and the eye then radiates out to the more saturated cooler images, and then it bounces back to the centre. With the grid layout it almost feels as if you are viewing them through a window and it bounces the eye from one point of interest to the next. This works beautifully and the 1:1 format of the images is reinforced by the shape of the frame and mounts I’ve chosen.
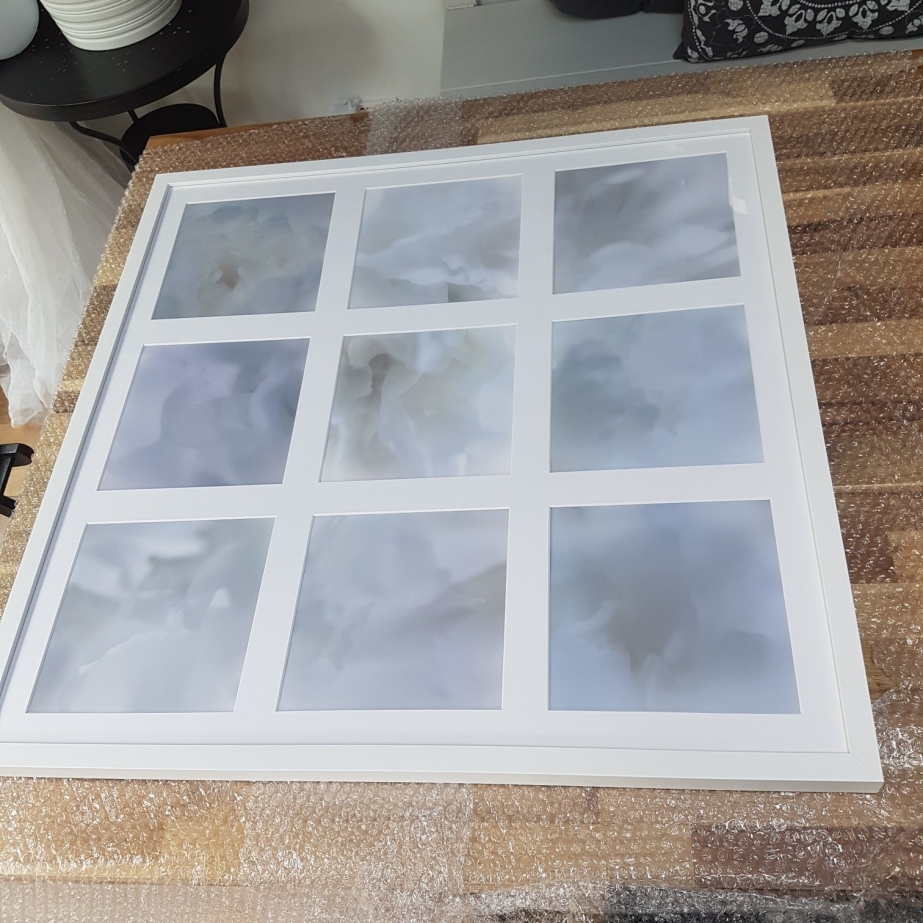
I’ve decided on a simple white mount and thin white frame. The reason for my choice is that I did not want the frame (or mount) to take away or overpower the images. I wanted the frame to pull all the images together so that they can be perceived as one piece. This was achieved beautifully and as I mentioned the eye bounces around the “image” (9 images) and keeps the interest of the viewer. Because it is a bespoke frame, timing was very tight (I received the frame after 19:00 the night before it was due to be handed in!) Once I framed the artwork and presented it to the class I realised that the dimentions of the mounts were slightly off and the outer border was narrower (only by a few millimeters) than the centre – this I guess is due to the fact that the mount sits slightly under the frame, something I did not account for. Also, Ria told me that a mount should always be 20% broader to the bottom of the piece as it is perceived to be thinner due to the positioning. I did not know this. So this is something to remember for next time.
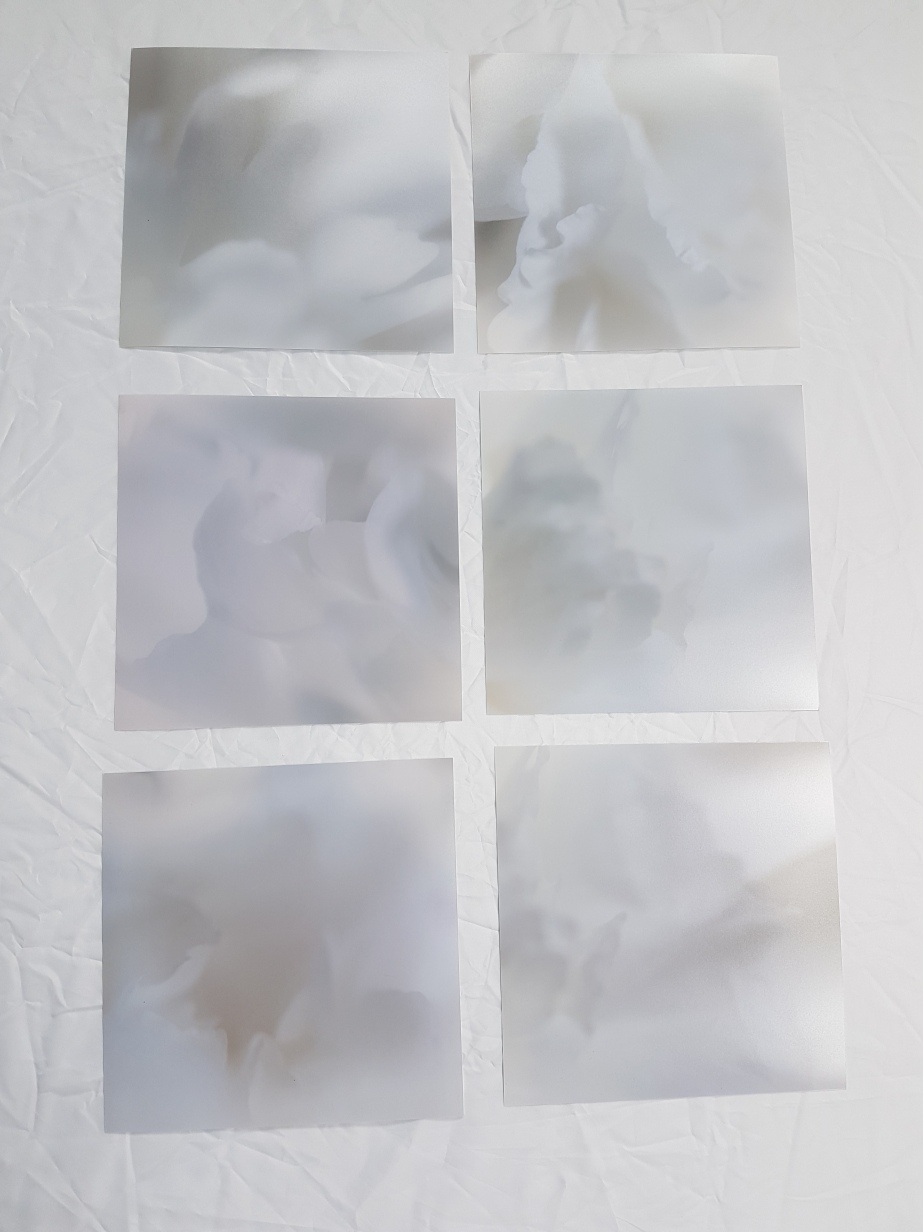
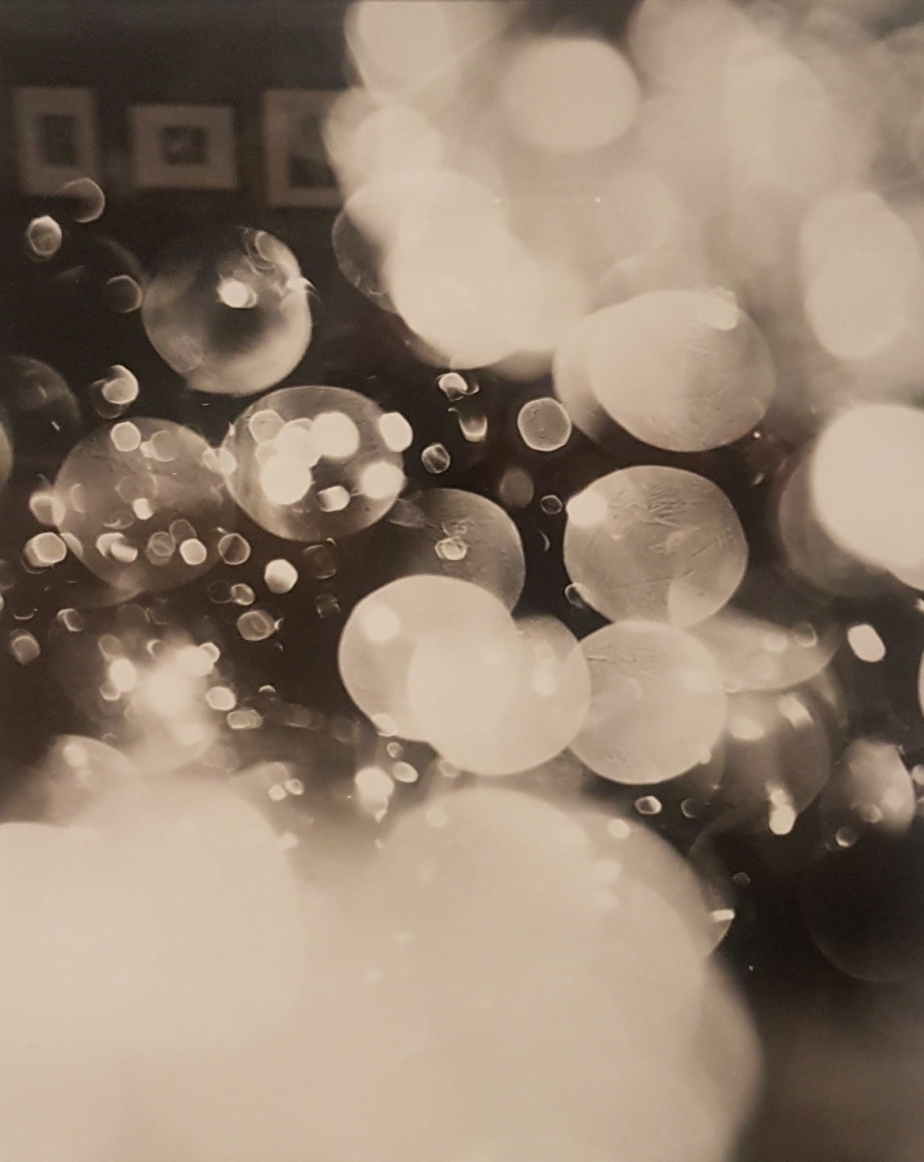
I’ve printed my images on Hahnemuhle Photo Rag 308 Fine Art paper (as described in my previous post). My test shots were done on lustre paper and I printed a couple on a c-type pearl paper to test. I believe that I made the right choice as the Photo Rag paper was smooth and 100% cotton. The prints came out beautifully and the quality of the paper enhanced my images. The quality matt finish of the paper made the images feel quieter, softer and definitely with less contrast than the glossier versions of my test shots. This resulted in images that felt subdued, muffled and dreamy in a way with a tender feminine feel to them. They successfully portray my vision of fragility and delicacy, which is the feelings I wanted the viewer to experience when looking at my work. I feel that you can get lost in these images, and though I wanted them to reflect my feelings of life (and death) and how delicate and fragile and fleeting time is, they can portray so much more to each viewer. I have therefore decided to keep my work untitled to further give the viewer the opportunity to see in the work what they want…
In hind sight I might have reworked some of the images as the colour tones on the Photo Rag 308 paper is slightly darker than what expected. One image in particular is slightly too lilac in colour and another the vignette is perhaps not feathered enough in one corner.


")
")
")
")


")
")
")
")
")
")


")
, 2006")
")
, 2007 (1)")

")
")
")
")
")
")
")